
Bringing your favorite characters to life through cosplay is an incredibly rewarding experience. For many, the ultimate challenge and triumph come from crafting intricate cosplay armor. Whether you're aiming to embody a heroic knight, a futuristic soldier, or a fantastical creature, learning how to make a cosplay armor piece from scratch can seem like a monumental task. But fear not! This comprehensive guide will walk you through every essential step, transforming complex ideas into tangible, impressive armored cosplay.
From selecting the right materials to the final coat of paint, we'll cover the techniques and insights you need to confidently make cosplay armor that turns heads. Get ready to dive into the world of DIY armor crafting and unlock your creative potential!
Embarking on Your Armored Cosplay Journey
Every great journey begins with a single step, and crafting your own armor is no exception. Before you even think about materials, it's crucial to lay a solid foundation. This involves understanding the scope of your project, setting realistic expectations, and gathering inspiration that will fuel your build.
Understanding the Scope and Setting Expectations
Take a moment to assess the complexity of the armor you wish to create. Is it a simple shoulder piece, or a full suit of articulated plates? Acknowledge that intricate designs will require more time, patience, and potentially a wider array of tools and techniques. Start with a manageable project if you're a beginner, gradually building your skills.
Gathering Inspiration and References
High-quality reference images are your best friend. Collect multiple angles of your character's armor – front, back, sides, and any specific details. Look for fan art, official concept art, and even other cosplayers' interpretations. These references will be invaluable for accurate design and proportion. Don't just look at the overall shape; zoom in on textures, seams, and battle damage.
Essential Tools and Workspace Setup
A well-prepared workspace and the right tools make all the difference. You don't need a professional workshop, but a clean, well-ventilated area is crucial. Here are some basic tools you'll likely need:
- Cutting Tools: Sharp craft knives (e.g., X-Acto, utility knife), scissors, rotary tool (Dremel).
- Heat Source: Heat gun (essential for shaping foam and thermoplastics).
- Adhesives: Contact cement (most common for foam), super glue, hot glue gun.
- Measuring & Marking: Measuring tape, ruler, protractor, markers, pens.
- Safety Gear: Cutting mat, respirator mask (for fumes), gloves, safety glasses.
- Sanding & Shaping: Sandpaper (various grits), rotary sanding bits.
Always prioritize safety. Work in a well-ventilated area, especially when using adhesives or spray paints, and wear appropriate protective gear.
If you’re planning to make your own cosplay armor, it might sound exciting at first—but in reality, it can be very time-consuming. You’ll need to gather a lot of materials from different stores, which can quickly become frustrating and overwhelming.
On top of that, there’s no guarantee your armor will turn out the way you imagined. If it doesn’t come out right, all your time, effort, and money can go to waste—and you may end up wondering what to do next.
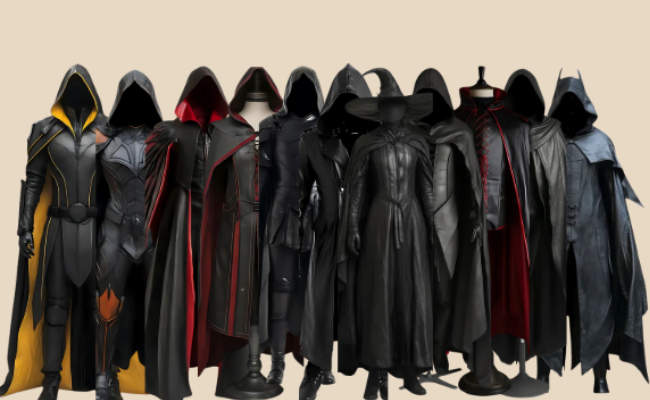
Instead of going through all that hassle, a smarter option is to get armor made specifically for your body size. At creed leather, we offer a wide range of cosplay armor designs to choose from. You can pick any style you like, and we’ll custom-make it to fit you perfectly.
This not only saves you time but also ensures a high-quality, premium look when you wear it—so you can focus on enjoying your cosplay instead of stressing over making it.
Choosing Your Armor Material: The Foundation of Your Build
The material you choose will largely dictate the look, feel, and durability of your cosplay armor. Each material has its own strengths, weaknesses, and learning curve. Understanding these will help you make an informed decision based on your project and skill level.
EVA Foam: The Cosplay Workhorse
EVA (Ethylene-vinyl acetate) foam is arguably the most popular material for make cosplay armor due to its versatility, affordability, and ease of use. It's lightweight, flexible, and can be easily cut, shaped with heat, and glued.
- Pros: Lightweight, flexible, easy to cut and shape, relatively inexpensive, takes paint well.
- Cons: Can be damaged if not sealed properly, requires specific adhesives, can be bulky if not thinned.
- Types: Available in various thicknesses (2mm, 5mm, 10mm are common), densities, and forms (floor mats, craft foam sheets, foam rolls).
Thermoplastics: Worbla and Beyond
Thermoplastics like Worbla, Wonderflex, and Thibra are fantastic for creating rigid, durable, and highly detailed armored cosplay pieces. They become pliable when heated and harden as they cool, allowing for intricate sculpting.
* Pros: Extremely durable, holds shape well, can be sculpted in detail, self-adhesive when heated (Worbla). * Cons: More expensive than foam, heavier, requires more heat control, can be difficult to get smooth surfaces without filler.
Other Materials: PVC, Urethane Resin, 3D Printing

For advanced builders, other materials offer unique advantages:
- PVC Foam Board (Sintra): Rigid, smooth, can be heat-formed and sanded. Great for clean, hard-surface armor.
- Urethane Resin: Ideal for casting highly detailed, repeatable pieces. Requires molds and specialized safety precautions.
- 3D Printing: Offers unparalleled detail and precision. Requires a 3D printer, modeling software skills, and often significant post-processing (sanding, filling, painting).
Designing Your Armor: From Concept to Blueprint
Once you've chosen your material, it's time to translate your character references into a workable design for your body. This phase is critical for ensuring your armor fits correctly and looks authentic.
Scaling and Proportions
Accurate measurements are key. Measure yourself carefully: chest circumference, waist, arm length, leg length, shoulder width, etc. Use these measurements to scale your reference images or to draw your patterns directly onto paper. Remember to account for clothing worn underneath and ease of movement.
Sketching and Planning
Break down complex armor into individual components (e.g., chest plate, shoulder pauldron, gauntlet, helmet). Sketch each piece from multiple angles. Consider how each piece will attach to your body and to other armor sections. This planning prevents headaches later in the build. Think about how the armor will move with you – will it restrict your movement? Will it be comfortable to wear for extended periods?
Patterning and Cutting: Bringing Your Design to Life
With your design planned, the next step is to create patterns that will guide your material cutting. This is where your flat sheets of foam or thermoplastic begin to take shape.
Creating Templates
There are several effective methods for creating patterns:
- Duct Tape Dummy Method: For form-fitting pieces like a chest plate, wrap your body (or a dress form) in plastic wrap, then cover it with duct tape. Draw your armor lines directly onto the duct tape. Cut the duct tape shell off, then cut along your drawn lines to create flat pattern pieces. These can then be transferred to paper or directly to your material.
- Paper Patterns from Reference: Print out reference images to scale and trace the armor pieces, adjusting for your body measurements. You can also freehand draw patterns onto large sheets of paper.
- Direct Patterning: For simpler pieces, you might draw directly onto your material, but it's generally safer to use a paper template first to avoid costly mistakes.
Transferring and Cutting Materials

Once you have your paper patterns, carefully trace them onto your chosen material. Use a fine-tip marker or pen for precision. When cutting, always use a sharp blade. A dull blade can tear foam and leave jagged edges. For straight lines, use a ruler or straight edge as a guide. For curves, take slow, deliberate cuts, rotating the material as needed. Bevel cuts (cutting at an angle) are essential for creating seamless joints when assembling foam pieces.
Shaping and Forming Your Armor Pieces
This is where your flat material truly transforms into three-dimensional armor. Heat is your primary tool for shaping most cosplay materials.
Heat Shaping EVA Foam
EVA foam becomes pliable when heated. Use a heat gun to gently warm the foam, then carefully bend and hold it in the desired curve until it cools and retains its new shape. Practice on scrap pieces to get a feel for how the foam reacts to heat. Overheating can cause the foam to bubble or shrink.
Working with Thermoplastics
Thermoplastics require more heat than foam. Use a heat gun to warm the material until it becomes soft and moldable. You can then drape it over forms, sculpt it by hand (wearing gloves!), or press it into textures. As it cools, it will become rigid. Multiple pieces of thermoplastic can be fused together by heating their edges and pressing them firmly.
Achieving Curves and Contours
To create complex curves, you might need to make small darts or cuts in your material. These can then be closed and glued to force the material into a specific contour. For larger, smoother curves, gently stretch and mold the heated material over a rounded object, like a ball or a mannequin.
Assembling Your Cosplay Armor
With all your pieces cut and shaped, it’s time to join them together to form the complete armor. The right adhesive and attachment methods are crucial for durability and a clean finish.
Adhesives: The Glue That Holds It Together
- Contact Cement: The go-to for EVA foam. Apply a thin, even layer to both surfaces you want to join. Let it dry until tacky (usually 5-15 minutes), then press the pieces together firmly. It creates an incredibly strong, flexible bond instantly.
- Super Glue (CA Glue): Useful for small details, quick fixes, or when you need an instant bond. Can be brittle on flexible materials.
- Hot Glue: Best for temporary holds, tacking pieces in place before permanent adhesion, or attaching fabric liners. Not ideal for structural bonds on armor.
Joining Techniques
- Butt Joints: Simply butt two edges together and glue. Often combined with bevel cuts for a seamless look.
- Bevel Cuts: Cutting edges at an angle (e.g., 45 degrees) so that when joined, they form a 90-degree corner with a smooth, continuous surface.
- Sandwiching: Gluing thinner pieces of foam or other materials between two main armor pieces to create depth or reinforce edges.
Strapping and Attachment Systems

Consider how your armor will be worn. Will it attach directly to your body, or to an under-suit? Common attachment methods include:
- Velcro: Easy to adjust and remove. Sew or glue industrial-strength Velcro to armor pieces and an under-suit.
- Buckles and Webbing: Great for adjustable straps on larger pieces like chest plates or leg armor. Securely rivet or glue webbing to the armor.
- Elastic: Provides flexibility and comfort, especially for areas requiring movement.
- Magnets: For removable pieces or hidden attachments, strong rare-earth magnets can be embedded into the armor.
Adding Details and Texture
This is where your cosplay armor truly comes to life, moving beyond basic shapes to intricate, character-accurate designs. Details elevate your build from good to phenomenal.
Engraving and Etching
Use a sharp craft knife or a rotary tool with a fine bit to engrave lines, patterns, or runes into the surface of your foam or thermoplastic. Practice on scrap pieces to control depth and consistency. For a cleaner look, you can fill engraved lines with caulk or a flexible filler before painting.
Sculpting with Foam Clay or Caulk
Foam clay is an air-drying clay that adheres well to EVA foam and can be sculpted into raised details, emblems, or organic textures. Once dry, it remains flexible. Similarly, flexible caulk (like DAP Kwik Seal) can be used to create raised details, fill gaps, and smooth seams. Apply with a caulk gun or a small tool, then smooth with a wet finger or sculpting tool.
Weathering and Damage Effects
To give your armor a battle-worn, realistic look, consider adding weathering. Use a rotary tool to carve dents, scratches, or bullet holes. Heat can be used to create melted or warped effects. These details should be added before priming and painting, as the paint job will further enhance them.
Painting and Finishing for a Realistic Look

Painting is the final step that brings your armored cosplay to life, adding depth, realism, and character. A good paint job can hide imperfections and make even simple builds look professional.
Priming Your Armor
Before painting, foam armor must be sealed. This prevents the foam from absorbing paint and gives you a smooth surface. Popular sealants include:
- Plasti Dip: A rubberized spray coating that provides a flexible, durable base. Apply several thin coats.
- Mod Podge/Wood Glue: Can be brushed on in multiple layers, though it's less flexible than Plasti Dip.
- Flexbond: A flexible, brush-on sealant specifically designed for foam.
Thermoplastics generally don't require sealing, but a light primer can help paint adhere better.
Base Coats and Layering
Apply your base color using spray paint or acrylic paints. Spray paint provides a smooth, even finish quickly. For intricate areas, use brush-on acrylics. Apply multiple thin coats rather than one thick coat to avoid drips and ensure even coverage. Allow each coat to dry thoroughly.
Shading, Highlighting, and Weathering Effects
This is where the magic happens:
- Shading: Use darker paints in recesses and along edges to create depth and shadow.
- Highlighting: Apply lighter paints to raised areas and edges to make them pop.
- Dry Brushing: Dip a brush in a small amount of paint, wipe most of it off, then lightly drag the brush over raised textures to catch edges and create a worn look.
- Washes: Diluted dark paint can be applied over the entire surface and then wiped off, settling into recesses to enhance grime and shadows.
- Airbrushing: Offers fine control for gradients, subtle weathering, and intricate details.
Sealing and Protecting Your Paint Job
Once your paint is completely dry, apply a clear topcoat to protect it from scuffs, scratches, and UV damage. Choose between a matte, satin, or gloss finish depending on the desired look of your armor. Spray-on clear coats are easiest for even application.
Wearing and Maintaining Your Masterpiece
Your cosplay armor is complete! Now, it's essential to know how to wear, store, and maintain it to ensure its longevity and continued impressive appearance.
- Proper Storage: Store armor in a cool, dry place away from direct sunlight. Hang larger pieces or store them flat to prevent warping. Avoid stacking heavy items on top of foam armor.
- Cleaning: For most materials, a damp cloth with mild soap is sufficient for cleaning. Avoid harsh chemicals that could damage paint or material. For intricate details, use a soft brush.
- Repairs: Minor dings or paint chips can be touched up with matching paint. For larger damage to foam, you might need to re-glue, fill, and repaint. Keep spare material and paint on hand for quick fixes.
- Transporting: Use sturdy boxes or garment bags when transporting your armor to conventions. Pack pieces carefully to prevent rubbing or crushing. Consider custom foam inserts for delicate parts.
Common Challenges and Troubleshooting
Even experienced crafters encounter issues. Here are some common problems and how to address them when you make cosplay armor:
- Seams Showing: If contact cement isn't holding perfectly, or gaps appear, use flexible caulk, foam clay, or a thin bead of contact cement to fill and smooth the seam before priming.
- Paint Cracking: This often happens if the foam wasn't sealed properly, or if non-flexible paints were used on flexible foam. Ensure you use a flexible primer like Plasti Dip and flexible acrylic paints.
- Armor Not Fitting: If pieces are too tight, carefully cut relief lines or add elastic inserts. If too loose, you might need to add padding or adjust strap lengths. Always test fit throughout the build.
- Time Management: Armored builds take time. Break your project into small, manageable steps and set realistic deadlines for each. Don't rush; quality takes patience.
Frequently Asked Questions About Making Cosplay Armor
What is the best material for beginners to make cosplay armor?
EVA foam is widely considered the best material for beginners due to its affordability, ease of cutting, shaping with heat, and general versatility. It's forgiving and allows for many mistakes without significant cost.
How long does it typically take to make a full suit of cosplay armor?
The time required to make a full suit of cosplay armor varies greatly depending on complexity, skill level, and available time, but it can range from a few weeks for a simpler design to several months for an intricate, highly detailed build.
Do I need a heat gun to make foam armor?
Yes, a heat gun is an essential tool for making foam armor as it allows you to shape and form flat EVA foam sheets into three-dimensional curves and contours. Without it, your armor would be flat and rigid.
How do I make cosplay armor durable for conventions?
To make cosplay armor durable, use strong adhesives like contact cement, reinforce attachment points, and properly seal and clear-coat your paint job to protect against scuffs and wear. Transport and store it carefully.
Can I make cosplay armor without expensive tools?
Yes, you can make impressive cosplay armor with a relatively inexpensive set of basic tools, including a craft knife, cutting mat, ruler, measuring tape, heat gun, and contact cement. Advanced tools can be acquired as your skills grow.
How do I get smooth seams on my foam armor?
To get smooth seams on foam armor, use precise bevel cuts, apply contact cement evenly to both surfaces, and press them firmly together. Any small gaps can be filled with flexible caulk or foam clay before priming and painting.
What kind of paint should I use for cosplay armor?
For cosplay armor, use flexible paints like acrylics (either spray or brush-on) after priming with a flexible sealant like Plasti Dip. This prevents the paint from cracking as the foam flexes during wear.
How do I attach armor pieces to my body or costume?
Armor pieces can be attached using various methods such as industrial-strength Velcro, adjustable straps with buckles and webbing, elastic bands, or even strong rare-earth magnets embedded within the armor itself.
Conclusion
Crafting your own cosplay armor is a journey of learning, problem-solving, and immense creative satisfaction. From the initial spark of an idea to the final protective clear coat, each step brings you closer to embodying your chosen character. By understanding materials, mastering basic techniques, and embracing the process, you can confidently make cosplay armor that is not only visually stunning but also durable and comfortable to wear.
Remember, every piece of armor tells a story – both of the character it represents and of the dedication of the crafter behind it. So, gather your tools, unleash your creativity, and embark on your next incredible armored cosplay adventure. The world of cosplay awaits your masterpiece!
